Welcome beauties! Contouring has become a popular makeup technique that allows you to enhance your facial features and achieve a sculpted, flawless look. The art of contouring involves using shading and highlighting techniques to create depth and dimension, giving your face a more defined appearance. However, to achieve that perfect contour, it's crucial to have the right tools and brushes in your makeup arsenal. In this blog post, we'll explore the essential tools and brushes you need to slay your contour game and achieve a flawless finish.
KEY TAKEAWAYS
- ⚡ The right tools are essential for flawless contouring: Achieving a sculpted, natural finish relies on using the correct brushes, sponges, and applicators suited to your product type and technique.
- ⚡ Different tools serve different contouring purposes:
- Brushes: Offer precision and control, perfect for targeted application and defining features.
- Sponges: Deliver seamless blending and a soft, airbrushed effect.
- Fingers: Provide warmth and precision for cream-based contours.
- ⚡ Essential brushes every contour kit needs:
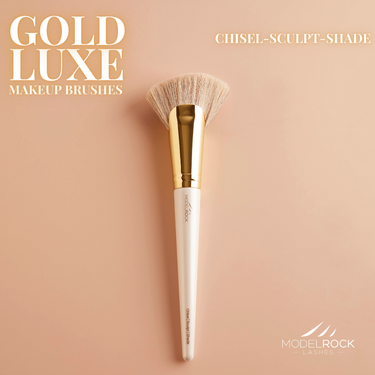
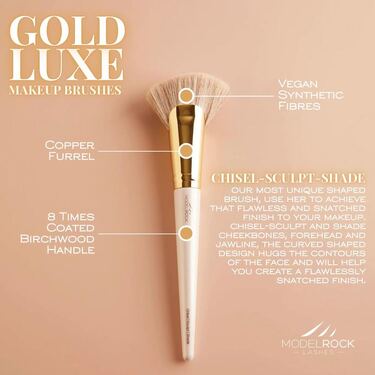
- Angled Brush: Sculpt cheekbones and jawline precisely — try the Gold Luxe Chisel-Sculpt-Shade Brush.
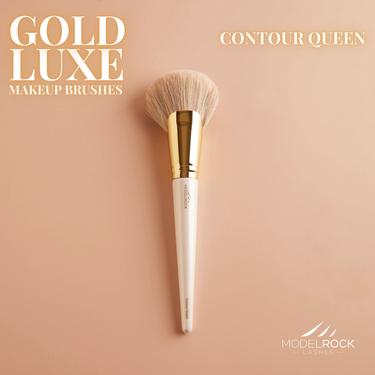
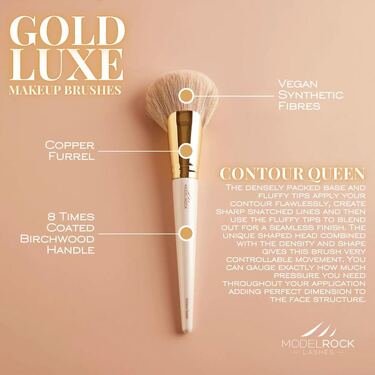
- Fan Brush: Ideal for diffused, soft contour — use the Gold Luxe Contour Queen Brush.
- Fluffy Brush: Perfect for blending edges and achieving a natural, airbrushed look — the Gold Luxe Multi-Tasker Brush excels here.
- ⚡ Brush technique makes all the difference:
- Use angled brushes for powders, dense brushes for creams, and stippling brushes for liquids.
- Tap off excess product before applying to prevent harsh lines.
- Blend upward toward the temples for lifted cheekbones and use circular motions for soft transitions.
- ⚡ Alternative contour tools worth exploring:
- Sponges: Deliver smooth, streak-free finishes — ideal for creams and liquids.
- Fingers: Offer precision for small areas and build product intensity.
- Dual-ended brushes: Versatile for applying and blending with one tool.
- ⚡ Proper maintenance ensures long-lasting performance: Clean tools after every few uses with a gentle cleanser like MODELROCK’s Solid Soap Brush & Sponge Cleaner and dry completely to prevent bacteria build-up.
- ⚡ Troubleshooting common contouring issues:
- Streaky application: Use less product and blend in thin layers.
- Patchiness: Prep skin with moisturizer and blend thoroughly using a damp sponge.
- Difficult blending: Switch to cream formulas and use soft, fluffy brushes or sponges for diffusion.
- ⚡ Expert tips for a flawless finish:
- Practice and patience perfect your contouring skill.
- Start light—build intensity gradually for a natural look.
- Adapt contour intensity to the lighting of your environment for balanced results.
- Blend thoroughly to avoid harsh lines and ensure smooth transitions.
- ⚡ Final takeaway: Choosing the right contour tools, maintaining them properly, and mastering blending techniques are key to achieving a seamless, sculpted finish every time.
UNDERSTANDING DIFFERENT TYPES OF CONTOURING TOOLS:
When it comes to contouring, there are various tools available in the market to help you achieve the desired effect. The most common options include brushes, sponges, and even using your fingers. Each type of tool has its pros and cons. BRUSHES, for instance, offer precision and control, making them ideal for detailed contouring. SPONGES, on the other hand, excel at blending and creating a seamless finish. Your choice of tool will depend on factors such as your personal preference, skill level, and the specific contouring effect you wish to achieve.

ESSENTIAL BRUSHES FOR CONTOURING:
Among the different tools available, brushes are widely favoured for contouring. They come in various shapes and sizes, each serving a specific purpose.

When choosing a brush, consider the technique you'll be using and the texture of your contouring product. Look for brushes from reputable brands known for their quality and durability.
HOW TO USE BRUSHES FOR CONTOURING:
Using brushes for contouring is an art in itself. Here's a step-by-step guide to help you master the technique:
- Choose the right brush for the product: Use an angled brush for powder contour, a dense brush for cream contour, and a STIPPLING BRUSH for liquid contour.
- Load the brush: Gently dip the brush into your contour product and tap off any excess to avoid a heavy application.
- Apply the contour: With a light hand, start at the hollows of your cheeks and blend the product in upward strokes towards your temples. Remember to focus on the areas you want to sculpt and define.
- Blend it out: Use circular motions or gentle strokes to blend the contour seamlessly into your skin. This step is essential to achieve a natural-looking finish.
- Check for symmetry: Always step back and assess both sides of your face to ensure symmetry and make any necessary adjustments.
Don’t forget to check out our previous blog HOW TO CONTOUR YOUR FACE for an in-depth tutorial.

ALTERNATIVE TOOLS FOR CONTOURING:
While brushes are the go-to option for contouring, there are alternative tools that can yield impressive results. Makeup sponges, fingers, or dual-ended brushes are popular alternatives. Sponges provide a flawless, airbrushed finish, while fingers offer warmth and precision. Dual-ended brushes can be handy for multitasking. Experiment with these tools to find what works best for you. Remember to clean and maintain them regularly to ensure optimal performance and hygiene.

CARING FOR YOUR CONTOURING TOOLS:
To prolong the lifespan of your contouring tools, it's important to clean and maintain them regularly. Clean brushes, sponges, and other tools after every few uses to prevent product buildup and bacterial growth. Use our SOLID SOAP BRUSH & SPONGE CLEANER to gently wash the bristles or sponge. Allow them to dry completely before storing them in a clean and dry area. Proper care ensures hygienic and long-lasting use of your contouring tools.

TROUBLESHOOTING COMMON CONTOURING TOOL CHALLENGES:
Contouring tools can sometimes present challenges that can hinder your flawless contour. Some common issues include streaky application, patchiness, and difficulty in blending. To overcome these challenges, here are some solutions and troubleshooting techniques based on the type of tool used:
- Streaky Application: If you notice streaks in your contour, it's likely due to uneven distribution of product. To solve this, ensure you're using the right amount of product and apply it in thin layers, gradually building up the intensity. Blend the product using gentle, circular motions, ensuring even coverage. Using a clean brush or sponge, go over the contour again to blend out any streaks.
- Patchiness: Patchy contour can occur when the product doesn't blend seamlessly into the skin. To address this, start by prepping your skin with moisturizer to ensure a smooth canvas. Use a small amount of product at a time and focus on blending it thoroughly. Work in layers, allowing each layer to blend before adding more product. If you still notice patches, try using a damp sponge to blend out the contour for a more seamless finish.
- Difficulty in Blending: Sometimes, certain products or tools may make blending more challenging. If you're struggling to blend your contour, consider switching to a cream or liquid formula, as they tend to be more forgiving and easier to blend. Use a damp sponge to blend the product into the skin, gently bouncing it for a natural effect. Alternatively, try using a fluffier brush or a fan brush to diffuse the edges and blend the contour effortlessly.

ADDITIONAL TIPS FOR A FLAWLESS CONTOUR:
To achieve a flawless contour, keep the following tips in mind:
- Practice Makes Perfect: Contouring is a skill that improves with practice. Take the time to experiment and find the techniques and tools that work best for you.
- Less is More: It's easier to add more product than to remove excess. Start with a light application and build up gradually for a more natural-looking contour.
- Lighting Matters: Contouring should be tailored to the lighting conditions you'll be in. Consider natural light, indoor lighting, or specific event lighting to ensure your contour looks its best.
- Blend, Blend, Blend: The key to a seamless contour is thorough blending. Take the time to blend the product well into your skin, ensuring there are no harsh lines or visible edges.
- Customize to Your Face Shape: Contouring should be personalized based on your unique face shape. Study your features and use contour strategically to enhance your best features and create balance. Check out our previous blog CONTOURING FOR DIFFERENT FACE SHAPES for more information.

CONCLUSION:
In conclusion, achieving a flawless contour requires the right tools and brushes. By understanding the different types of contouring tools, such as brushes, sponges, and fingers, you can choose the ones that suit your preferences and desired effects. Essential brushes like angled brushes, fan brushes, and fluffy brushes cater to various contouring techniques and product textures. By properly using these tools, loading, and blending contouring products, you can achieve a seamless and natural-looking finish.

Remember to experiment with different tools and techniques to find what works best for you. Everyone's skill level and desired contouring effect may vary, so it's important to discover your personal preferences. Lastly, don't forget to clean and maintain your contouring tools regularly for optimal hygiene and longevity.
With the right tools, techniques, and a dash of confidence, you can slay your contour game and achieve a flawless contour every time. So go ahead, embrace the art of contouring, and #GETYOURMODELROCKON.